Feeds:
Posts
Comments

Archive for the ‘Worth the trouble’ Category

Indian cooking is great for the Fast because most of it is already vegan or pretty darn close.  The key to flavors is lots of spices and time.

In this recipe, the essential ingredient is the fenugreek leaves.  I could not find them in our grocery store so I had to order them online.

The finished curry should be slightly thick like a good gravy.  It shouldn’t be runny.  You can mash some beans at the end to thicken the sauce.

You can also make this recipe in the Instant-pot.  To do that: soak the beans over night, make the curry, add the beans, and cook on high pressure for 25-30 minutes, let the pressure down naturally, add the fenugreek leaves, simmer gently, serve

Ingredients

1 cup kidney beans soaked overnight with 1 teaspoon salt

1 large onion (1-1/2 cups) chopped

2-3 tomatoes (1 cup) chopped

3 garlic cloves pasted or grated on a microplane

1 inch of ginger pasted or grated on a microplane

1 green chile (optional) pasted or grated on a microplan

1 teaspoon ground coriander (or roasted and ground fresh coriander seed)

1/4 teaspoon red chile powder

1/4 teaspoon turmeric

1/2 teaspoon garam masala

1/2 teaspoon cumin seeds

1 teaspoon crushed kasuri methi (fenugreek leaves)

2 tablespoons oil

1 1/2 cups of reserved bean cooking water or plain water

**Family size should double this recipe

  1.  Lord, bless my work.
  2. Rinse soaked beans and cook 1 hour on the stove top or until tender, or 40-45 minutes under high pressure Instant pot.  Reserve cooking liquid.
  3. Make the curry: Heat oil in the pot and gently saute onions until they are lightly brown or even to caramelization
  4. Add the garlic, ginger, and green chile past and saute on low until fragrant (a very short time)
  5. Add the tomatoes and saute until soft, 2-3 minutes
  6. Add all spices, turmeric, red chile, coriander, garam masala, stirring constantly
  7. Add the beans, stirring
  8. Add 1 1/2 cups of bean cooking liquid (the start helps the sauce thicken) or plain water, stir
  9. Salt to taste
  10. Simmer for 10-15 minutes until thickened
  11. Add the fenugreek leaves, stir and simmer briefly
  12. Serve over rice

Read Full Post »

Have you seen the movie Octpob? Remember how that repentant monk slept next to the furnace getting all dirty and smoky?  That’s how I felt fixing today’s recipe.  Not repentant, but rather, perfectly willing to get very dirty and smoky crouching next to the grill.  Baba’s distinctive smoky flavor makes it one of my favorite Middle Eastern dishes.  (If you live anywhere near Lansing, Michigan you have to try baba ghanoush at Sahara’s.  The best.)

To get the delicious smoke flavor of baba ghanoush you have to burn up the eggplant skin.  There are many ways to do it.  Those who know me will vouch that my husband and I always do things the hard way (for better or for worse).  Making baba ghanoush is surely no exception.  So, if you want to do this the C. Family way you must first build yourself a cob grill.  Get some straw, clay soil, and a tarp and start stomping and mixing.


Then build it up into some kind of grill shape.  Let that cure for a week.

Mmmmm Chocolate Cake

Then get a grill grate and pop it on top.   Build a fire and start smoking your eggplant.

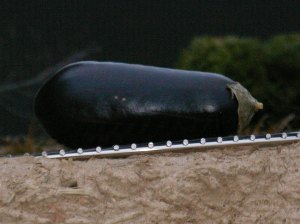
Or, if time of sanity prevents this you can grill an eggplant on your Weber or broil it.  If you have a gas stove I’m told you can burn it very carefully over the burner.

Now, if you don’t like smoky, just skip all of that trouble. Baba ghanoush is  great with falafel, pita and za’atar, mujadarra, and hummus. Baba is a dip so get some pitas or make your own.

Baba Ghanoush

1 large eggplant

1 clove garlic

2 generous Tbsp tahini

1/4 cup lemon juice

1/2 tsp salt (more to taste)

pinch of cumin (if desired)

Step 1. Lord, bless my work.

Step 2. For smoky flavor- grill or broil eggplant until the skin has turned black and bubbly (or just about to bubble).  Remove from fire. This takes about 10-15 minutes.  Watch carefully.  If you’re doing the lent thing right you’re probably getting more vigilant every day so good work.

Step 3. POKE HOLES! in the eggplant with fork.  Place eggplant in a 375 degree oven until it is very soft.  This takes about 20 more minutes.  Remove from oven.  Let rest to cool.

Step 4. When the eggplant is cool enough to handle (how cool depends on your spiritual excellence) remove the skin from the eggplant.  Place eggplant in a bowl and mash thoroughly with a fork.  Stir in remaining ingredients.

Step 5. Try to make the baba look pretty.  Like all lenten foods this is tough.  Try putting the baba on a plate and swirling it with the back of spoon.  Add a little pool of olive oil to the middle.  Hit it with a dash of paprika or parsley.  Enjoy!

Read Full Post »

Falafel fixins

The Yia Yia inside of me is frequently worried about the many, many single Orthodox people I know.  These are young, pious people who are real catches.  Nay, even, great catches.  If only they could meet each other, fall in love, and, as the wedding blessing says,  have “a peaceful life, length of days, chastity, mutual love in the bond of peace, long‑lived offspring, gratitude from their children, and, a crown of glory that does not fade away.”

If you are an Orthodox Christian of either sex looking for a spouse, then you need this recipe.  Falafel goes straight to the heart- in a good way.  Look, I am not much of a wife but I can make falafel and so I am still married. If it has done this for me, imagine what it can do for you.

Falafel is perhaps the most delicious fasting food out there.  If, like Daniel, you “eat no pleasant food” during the fast then you better skip this post.  For everyone else a falafel recipe.

Some important information on making falafel:

  • You need either a food processor or a mortar and pestle.  The chickpeas need to be roughly ground.  I don’t think the same can be accomplished with a blender.
  • Do not use canned or cooked chick peas to make your falafel.  Two terrible things will happen if you do.
  • The temperature of the oil is crucial.  Use a candy/fry thermometer and keep it in the oil.  Don’t start frying until it reaches the correct temperature and do not start the next batch until the oil returns to temperature.

One possibility is that your falafel will fall apart after a few minutes in the oil.

The second possibility, if your falafel do hold together, they will absorb too  much oil and be soft and smooshy.  They will still taste good but lack the better quality of falafel, and that is crunchiness.

Falafel mix from canned peas, too soft, too wet, no good.

  • You can roll falafel into a ball or patty by hand.  You can also use scoop up a tablespoon of falafel mixture with a tablespoon and use another tablespoon to press the mix into a patty shape.  For a good visual on shaping check out DedeMed. (about 7:45 minutes in)
  • Make sure your oil is hot enough.  You can measure with a candy thermometer or wait for your olive oil to reach its smoke point (375 degrees) and then turn it down.  I recommend a thermometer if you are a distracted cook.  I really don’t want you to burn your house down making falafel.
  • If you don’t want to use oil you can broil the falafel.  You will need to be creative to keep them from sticking to the pan.

Finally, chick peas and sesame are complementary proteins.  So, to obtain the most nutrition from this dish I recommend serving your falafel with tahini sauce, or on a pita with hummus(if made with tahini) and other fixings for a delicious falafel sandwich.  I would love to hear your success stories or answer any questions you have.  Please, don’t be discouraged if your first batch isn’t perfect.  Falafel is an art and requires practice and finesse.  Practice never tasted this good.

Falafel

1 cup dried chickpeas/garbanzo beans (do not substitute canned)

1/2 large onion, roughly chopped (about 1 cup)

2 Tbsp finely chopped parsley (optional but recommended)

2 Tbsp finely chopped cilantro (optional but recommended)

1 tsp salt

4 cloves of garlic

1 tsp cumin

1 tsp baking powder

4-6 Tbsp flour

Olive of vegetable oil for frying

Step 1. Lord, bless my work.

Step 2. Put the chickpeas in a bowl and add enough cold water to cover them by two inches.  Soak overnight, then drain.

Step 3. Place the drained, uncooked chickpeas and the onions in the bowl of the food processor with steel chopping blade.  Add parsley, cilantro, salt, hot pepper, garlic, and cumin.  Process until roughly chopped and blended but not pureed.  See picture

Chopped just right

Step 4. Sprinkle in the baking powder and 4 tablespoons floor, pulse or stir until blended.  Ideally the dough will form a ball and stick together without sticking to your hands much.  Refrigerate for several hours to blend flavors and make rolling easier.  You can skip the refrigeration but I think the rest really strengthens the flavors.

Step 5. Using your hands or two spoons shake the mixture into balls or patties, about the size of a walnut.

Step 6. Heat oil to 375 degrees in a deep pot or wok.  Fry one ball to test.  The falafel should immediately sizzle and start to turn brown.  Fry as many as will fit at once in your pot, turning after about 3 minutes to brown the other side.  This is the only cooking the beans get so make sure you cook em good.  You want your falafel brown on the outside and crispy.  The inside should be cooked but not mushy.  Think about a hushpuppie but not so cakey.

Drain on paper towels.  Eat!

Tahini Dipping Sauce

3/4 c tahini

1/2 tsp minced garlic

3/4 tsp salt

1/3 c lemon juice

1/2 to 2/3 c water

Step 1. Lord, bless my work.

Step 2. Mix tahini, garlic, salt, and lemon juice to form a smooth, thick paste.  Beat in water until the sauce is the consistency of heavy cream.


Read Full Post »
Pita Bread

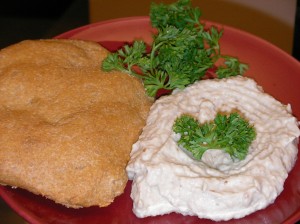
As promised I’m back with a recipe for homemade pita.  Of course, you can buy pita at the grocery store. But, if you’re interested in making a healthier protein rich pita at home this is your chance.  You can sub in a 1/4 cup of ground flax meal, ground chia seeds, ground quinoa, almond flour, peanut butter flour, pea protein, brown rice protein for part of the whole wheat flour.

Remember that warm food is more satisfying than cold food.  In fact, some great ascetics give up warm food on the way to sainthood.  But, I’m no where near that so I recommend a warm meal.  Brush you pita with za’atar and you are in good shape.

The following recipe is adapted from The King Arthur Flour Baker’s Companion (2003).

2 3/4 cups (12 3/4 ounces)  flour (OR 3 cups whole wheat flour omit alternative flour)

1/4 cup alternative flour (almond, peanut butter powder, pea protein, etc)

2 tsp instant yeast

2 tsp sugar

1 1/2 tsp salt

1 cup water

2 Tbs oil

Step 1. Lord, bless my work.

Step 2. In a large bowl combine all ingredients to make a shaggy dough.  Knead by hand for 20 minutes or by machine for 5 minutes.  Place dough in oiled bowl to rest for one hour.  The dough will rise but may not double.

Step 3. Turn the dough out onto an oiled surface and divide into 8 pieces.  Roll the pieces into 6 inch circles (or, circle-like shapes).  Place circles on lightly greased baking sheet and rest for 15 minutes.

Step 4. Preheat oven to 500 degrees.  On the lowest oven rack bake pitas for 5 minutes.  They should puff up.  If they don’t puff give it another minute.  If they still don’t puff your oven is not hot enough.  Consider turning up the heat for your next batch.

Step 5. Move the sheet to the middle rack and bake for 2 more minutes until the pitas are beautifully browned.

Step 6. Wrap in a clean dish towel to keep them soft until dinner.

“Should I use whole wheat flour?”  Yes, you should.

According to Francis Moore Lappe’s Diet for a Small Planet, a 3.5 ounce portion of whole wheat flour has about 13.3 grams of useable protein versus the 10.5 grams found in white flour.  The skin of the wheat berry, the bran, contains a good portion of the protein and this is removed to make white flour.

If one cup of flour is 4 1/4 ounces the total grams of protein in 8 pitas is almost 48.5.  Serve your pita with delicious, protein rich hummus.  For that recipe look to the next post.

Read Full Post »

I love all things Romanian.  I love the language, the accent, the food, the clothes, the friendly people.  I even love the unwarranted parenting advice from the ladies.  But, the thing I love most about Romanian culture and church is the coliva.  I can’t imagine someone who wouldn’t love this stuff.  Romanian coliva is sweet with a pudding like texture, a bit of crunch, and most importantly, it is fast friendly.  For you lovers of Greek style koliva, don’t worry, I’ll post a recipe for you too.

The most important ingredient to good Romanian style coliva is something called “skinless wheat.”   “What on Earth is skinless wheat?” you ask.  Well, as far as I can tell “skinless wheat” is a wheat berry without the bran.  It is like white rice or hulless barley.  Both of these have the outer skin removed for faster cooking.  Unfortunately, removing the bran also removes a good bit of the B vitamin content found in wheat.  That is how you make white flour and it is why white flour is fortified at the end of processing.

For those of you lucky enough to live close to Serbian party stores, in or around Detroit, skinless wheat should be easy to find.  For the rest of us skinless wheat is elusive.  Fortunately, I’ve figured out how to make your own at home.  What follows are my notes from an entire day of coliva experimentation.  Three batches later -perfection.

First, the master recipe:

1 1/3 c    Whole  wheat berries (I recommend soft white)

1 Tbs        vanilla extract

1/4 c        sugar

2 c            Ground walnuts

1/4 c       Raisins

Zest of one orange

Zest of one lemon

1 pkg graham crackers

Powdered sugar for decorating

Step 1. Lord bless my work.

Step 2. Skin the wheat as follows:

Put the wheat in the food processor to chop up the bran a little, then rinse the wheat in a bowl and drained off the bran with the water. Be careful, I don’t know if this will wreck your processor or not as wheat berries are hard as nails.   (My is still working but yours may be delicate.)
I repeated this a few times until the surface of the berries looked really rough.

Step 3. Place berries in a pot and cover with water about an inch over the top.  Add both zests.  Bring the berries to a boil the berries then simmer for 90 minutes until they are tender but NOT mushy. It will look like boiled barley.

Cool to room temperature so the starch can start to congeal.

Step 4. Drain off any remaining water and put the wheat back into the food processor for a couple of quick bursts. This will  get the starch flowing and the wheat gooping.  The berries should be a little chopped up and very sticky.

**Please note that you will NOT get the same pudding like texture from processing regular boiled wheat. I gave it a shot with the first batch of botched coliva and it just spun it around a little but didn’t cut it up or anything.

Step 5. Grind up the walnuts in the food processor. The walnuts should be like rough cracker crumbs or graham cracker crumbs. Watch it closely or you’ll have walnut butter real quick.

Step 6. In a large bowl combine wheat, sugar, walnuts, and raisins.  Some people swear by golden raisins.  Perhaps, this is just a matter of taste.  However, a nun told me to use golden raisins because they are the best and I do whatever nuns tell me to do.  You probably should too.

Step 7. Press the coliva into a pretty bowl or platter.

Step 8. Blast the graham crackers in the food processor.  Put these on top of the coliva to serve as a base for the powdered sugar.  If you do not use the crackers the sugar will soak right in and your coliva will be delicious but ugly.

Step 9. Dust with powdered sugar until the top is pure white.  Now decorate with a cross.  Make your cross out of Jordan almonds, cocoa, silver nonpareils, chocolate chips, plain almonds, etc.

Step 10. Deliver to church on time.  Trust me, it is super embarrassing to approach the offering table during the censing.

This recipe takes a long time.  Don’t forget, however, that you are making an offering for the dearly departed and your work is important.

Pofta buna!

Read Full Post »