Feeds:
Posts
Comments

Archive for the ‘Side dish’ Category

Soft Pretzels

This is a tasty recipe for company or game night with the kids.  Alton Brown’s recipes are very reliable.  He suggests a baking soda bath for the pretzels and it’s pretty good.

I’ve also done it with a lye solution and that was truly the bread which strengthens man’s heart.

Amazon sells food grade lye.  You’ll need gloves, a glass bowl, and parchment paper to protect your sheet pan.  Mix 30 grams (about 1 ounce) lye with 1 liter of water (about 1 quart) and using a plastic or wooden tool dunk the pretzels for 30 seconds.  You should be really careful, especially to protect your eyes, but the flavor is totally worth the effort.  Google around for more information–seriously! Don’t try this without more research.

You can serve the pretzels with brown mustard or with “Cheese” sauce.

Ingredients

1 1/2 cups warm water (110-115 degrees F)

1 tablespoon sugar

2 teaspoons kosher salt

1 package active dry yeast

22 ounches all -purpose flour, approximately 4 1/2 cups

2 ounces unsalted vegan butter spread , melted

vegetable oil for the parchment paper

10 cups water

2/3 cup baking soda

Pretzel salt

“Egg” wash:  1:1 water corn syrup, maple syrup, 1:1 sugar water solution, or vegetable oil

**The egg wash step is optional, but your pretzels won’t be as brown or shiny, they’ll still taste great

Directions:

  1.  Lord, bless my work.
  2. Combine the water, sugar and kosher salt in the bowl of a stand mixer and sprinkle the yeast on top.  Allow to sit for 5 minutes or until the mixture begins to foam.  Add the flour and vegan spread and, using the dough hook attachment, mix on low speed until well combined.  Change to medium speed and knead until the dough is smooth and pulls away from the side of the bowl, approximately 4 to 5 minutes.  Remove the dough from the bowl, clean the bowl and then oil it well with vegetable oil.  Return the dough to the bowl, cover with plastic wrap and sit in a warm place for approximately 50-55 minutes or until the dough has doubled in size.
  3. Preheat the oven to 450 degrees.  Line 2 half-sheet pans with parchment paper and lightly brush with oil.  Set aside.
  4. Bring the 10 cups of water and the baking soda to a rolling boil in an 8 quart saucepan or roasting pan.
  5. In the meantime, turn the dough out onto a slightly oiled work surface and divide into 8 equal pieces.  Roll out each piece of dough into a 24-inch rope.  Make a U-shape with the rope, holding the ends of the rope, cross them over each other and press on the bottom of the U in order to form the shape of the pretzel.  Place onto the parchment-lined half sheet pan.
  6. Place the pretzels into the boiling water, 1 by 1, for 30 seconds.  Remove them from the water using a large flat spatula.  (Or dip in the lye bath that you researched before you began) Return to the half sheet pan, brush the top of each pretzel with the egg wash mixture and sprinkle with pretzel salt.  Bake until dark golden brown in color, approximately 12-14 minutes.  Transfer to a cooling rack for at least 5 minutes before serving.
 

Read Full Post »

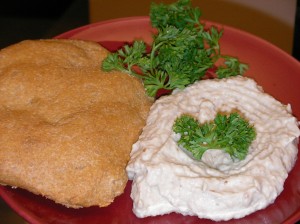
Have you seen the movie Octpob? Remember how that repentant monk slept next to the furnace getting all dirty and smoky?  That’s how I felt fixing today’s recipe.  Not repentant, but rather, perfectly willing to get very dirty and smoky crouching next to the grill.  Baba’s distinctive smoky flavor makes it one of my favorite Middle Eastern dishes.  (If you live anywhere near Lansing, Michigan you have to try baba ghanoush at Sahara’s.  The best.)

To get the delicious smoke flavor of baba ghanoush you have to burn up the eggplant skin.  There are many ways to do it.  Those who know me will vouch that my husband and I always do things the hard way (for better or for worse).  Making baba ghanoush is surely no exception.  So, if you want to do this the C. Family way you must first build yourself a cob grill.  Get some straw, clay soil, and a tarp and start stomping and mixing.


Then build it up into some kind of grill shape.  Let that cure for a week.

Mmmmm Chocolate Cake

Then get a grill grate and pop it on top.   Build a fire and start smoking your eggplant.

Or, if time of sanity prevents this you can grill an eggplant on your Weber or broil it.  If you have a gas stove I’m told you can burn it very carefully over the burner.

Now, if you don’t like smoky, just skip all of that trouble. Baba ghanoush is  great with falafel, pita and za’atar, mujadarra, and hummus. Baba is a dip so get some pitas or make your own.

Baba Ghanoush

1 large eggplant

1 clove garlic

2 generous Tbsp tahini

1/4 cup lemon juice

1/2 tsp salt (more to taste)

pinch of cumin (if desired)

Step 1. Lord, bless my work.

Step 2. For smoky flavor- grill or broil eggplant until the skin has turned black and bubbly (or just about to bubble).  Remove from fire. This takes about 10-15 minutes.  Watch carefully.  If you’re doing the lent thing right you’re probably getting more vigilant every day so good work.

Step 3. POKE HOLES! in the eggplant with fork.  Place eggplant in a 375 degree oven until it is very soft.  This takes about 20 more minutes.  Remove from oven.  Let rest to cool.

Step 4. When the eggplant is cool enough to handle (how cool depends on your spiritual excellence) remove the skin from the eggplant.  Place eggplant in a bowl and mash thoroughly with a fork.  Stir in remaining ingredients.

Step 5. Try to make the baba look pretty.  Like all lenten foods this is tough.  Try putting the baba on a plate and swirling it with the back of spoon.  Add a little pool of olive oil to the middle.  Hit it with a dash of paprika or parsley.  Enjoy!

Read Full Post »

Too much sunshine for a good picture.

My junior year of college I went on a Habitat for Humanity trip to South Carolina.  It was an incredible trip.  Beside the chance to serve others we had a lot of fun.  With good friends I built a shed, badly.  How bad?  Bad enough to get a facepalm from the volunteer leader.

Also, had my first experience with  “no see ums” .  Wow, talk about itchy.  The highlight might have been the fish fry and religious revival.  The revival was just okay- but the cornbread at that revival changed my life.  The bread was perfect.  It was sweet, salty, rich, not too crumbly, and moist.

This recipe is about as close to that memorable cornbread as we’ll get in Lent.

A cup of soy milk is called for but you can substitute water.  On the recommendation of my friend E. F. , whom I consider an expert, I substituted water and 1 tablespoon oil for the milk.

Quinoa (keen-wa) is optional in this recipe.  Adding the quinoa makes the cornbread protein and iron rich.

I don’t recommend these for muffins.  Without eggs and milk the batter sticks to the paper.  Also, because I used home milled cornmeal from white popcorn mine isn’t beautiful.  Your bread will be a gorgeous yellow.  Try this bread with Black Bean Chili, South American Red Bean Soup, and Bean Enchiladas with “Cheese Sauce”.

Quinoa Corn Bread 6 generous servings

1 1/4 cups yellow cornmeal

1 cup flour

2 1/2 tsps baking powder

1 tsp salt

1 cup corn kernels (creamed corn is a good option for moisture and sweetness)

1 cup soy milk, other non dairy milk, or water +1 tbsp oil

3-4 Tbsps maple syrup

1 cup cooked  quinoa

1/4 cup vegetable oil
Step 1. Lord, bless my work.

Step 2. Preheat oven to 400 degrees.  Generously oil a 6×10 inch baking dish, medium iron skillet, or pie plate.  If using a skillet or metal pan you can preheat them to make a good crisp crust on the bottom of the bread.

Step 3. To a large bowl, add the cornmeal, flour, baking powder, and salt, stir to combine.

Step 4. To a medium bowl, add the soy milk, maple syrup, corn kernels, quinoa, and canola oil.  Pour the wet ingredients into the dry flour mixture, and stir with a few quick strokes just until batter forms.  This is a very wet batter and not thick.

Step 5. Transfer the batter to the hot baking pan or hot skillet.  Bake for 25 minutes or until a toothpick comes out clean.

Read Full Post »

Mexican Rice

Mexican Rice with a side of Thumb

I spent two very hot summers working in the kitchen of a Mexican restaurant.  In spite of all the dangers of being a “line cook” (singed eyebrows, forearm burns so numerous they resembled Chinese characters, and soggy feet thanks to a stubborn floor drain), I loved the job.  The restaurant served good Spanish rice, and good Spanish rice is gently cooked in oil before adding the liquid.  A distracted cook can turn that gently cooking rice into a stinky, burning, pot-ruining mess so fast it could make demons jealous.   Unfortunately for my boss, I was a distracted cook.  Penitently, I am warning you not to take your eyes off of your rice.

Follow the recipe as written for white rice but be aware that rinsing white rice means you wash off all of the vitamin fortification.  Brown rice will maintain it’s nutritional value after rinsing. If you use brown rice follow the recipe as written but do not add the frozen peas until ten minutes before the rice has finished cooking.  Otherwise they will overcook and lose their beautiful color.  (See picture).

I think this rice would go great with South American Red Bean Soup

Brown rice has twice the protein of white rice.  I’m just sayin’…

Mexican Rice

1 cup long grain rice

7 ounce can chopped tomatoes in juice

1/2 onion, roughly chopped (about 1/2 cup)

2 garlic cloves, roughly chopped

2 Tbsp vegetable oil

Scant 2 cups vegetable stock

1/2 tsp salt

3 fresh green chilies, trimmed (optional)

1 cup frozen peas

pepper to taste

Step 1. Lord, bless my work.

Step 2. Put the rice in a heatproof bowl, pour in boiling water to cover, and let stand for 10 minutes.  Drain, rinse under cold water, and drain again.  Set aside to dry slightly.

Step 3. Meanwhile, pour the tomatoes and juice into a food processor or blender, add the onion and garlic and process until smooth.

Step 4. Heat the oil in a large, heavy pan, add the rice and cook over medium heat until it becomes a delicate golden brown.  Stir occasionally to ensure that the rice does not stick to the bottom of the pan. Seriously, do not take your eyes off of that pot.

Step 5. Add the tomato mixture and stir over a moderate heat until all the liquid has been absorbed.  Stir in the stock, salt, whole chilies, and peas.  Continue to cook the mixture until all the liquid has been absorbed and the rice is just tender.

Step 6. Remove the pan from the heat, cover it with a tight-fitting lid, and let it stand in a warm place for 5-10 minutes.  Remove the chilies, fluff up the rice, and serve.

Read Full Post »

Roasted Garlic

Our dear friend M.T. first introduced us to the rich, hearty flavor of roasted garlic.  M  always roasted a head for a party snack.  Roasted garlic is not typical college party fare; and the lingering odor on coats and jackets was often protested.  However, we all eagerly partook.

You may already know about garlic’s incredible immune boosting powers and use as a folk remedy.  I feel that good immunity is especially important during a fast as the body is a bit weaker.  Additionally, eating a head of garlic is a great way to keep you out of trouble with other fleshly sins.

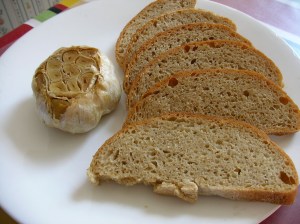
Spread roasted garlic on bread and enjoy.

Postings times will be irregular through the week as I will be traveling.  I apologize for any inconvenience.

Roasted Garlic

One head of garlic, top cut off

1/2 tsp salt

1-2 Tablespoons Olive Oil

Step 1. Lord, bless my work.

Garlic tops cut and exposed

Step 2. Preheat oven to 375 degrees. (toaster oven friendly) Slice off the top of the garlic (this is the end that does NOT have a root circle) so that all cloves are

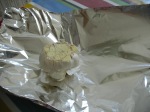
Step 3. Place bulb in the center of a piece of foil big enough to completely enclose the garlic.  Slowly pour oil over the top to saturate the bulb.  Sprinkle with

salt.  Wrap foil around garlic, completely enclosing it.

Step 4. Bake garlic for 45 minutes -1 hour until cloves are soft enough to spread.

Read Full Post »

Whenever I hear people raving about hummus I chuckle a bit.  “Hummus is sooo cool.”  “Hummus is delicious, nutritious, and trendy.”  For us Orthodox, after a couple of months of fasting hummus is blah, blah, blah.  Here at the head of the great fast, we’re ready to eat it up.  Perhaps, with homemade pita, za’atar, and a really great recipe, hummus can stay delicious through the fast. Even when the delicious has worn off hummus will still be nutritious.

According to Francis Moore Lappe, author of Diet for a Small Planet, the two main ingredients in hummus, chick peas and tahini, are complementary proteins.

For those unfamiliar with Diet for a Small Planet, part of Lappe’s general theory is that meat is not necessary for building health.  It is true that animal products contain more of the amino acids necessary for the body to utilize protein as fuel.  Unfortunately, animal protein is expensive for the consumer and the planet.  As an alternative Lappe suggests eating plants in particular combination increase the useable protein.  “…eating daily (for practicality, in the same meal) different plant foods in which the amino acid deficiency of one item is supplemented by the amino acid contained in others.  This diet is more efficient…because the complementary effect of the mixture means that more of the protein can be used by the body (less is lost and converted to fuel).  (1975, 80)

Hummus combines chick peas and tahini (sesame seed paste).

According to Lappe one cup of chick peas eaten alone have a protein equivalent of a 4 1/2 ounce steak. (mmm steak)

1 1/2 cups of sesame seeds eaten alone has the same.

Combined, the useable protein is increased by 27%.  The combination makes the sesame/chickpea worth a 10 1/2 ounce steak.  (oooo steak)

Through the fast just keep telling yourself that your hummus is like a steak.  Note I said hummus is like a steak.  Simile not metaphor.

Hummus

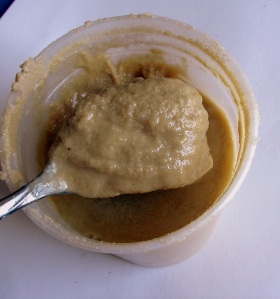
Tahini This texture is a little lumpier than your finish product should be.

3 c cooked or 2 cans garbanzo beans(chick peas)

1/4 c tahini *

2 garlic cloves, mashed

2 Tbs lemon juice

1 tsp salt

1/2 tsp cumin

Step 1. Lord, bless my work.

Step 2. Cook dry beans according to package directions, reserve cooking liquid.  Open bean can, drain, reserve liquid.

In a blender, food processor, or mortar and pestle combine all ingredients and mix until very smooth.  Smoother is better.  Ideal consistency is between very wet and dry.  If you dipped your pita into the mix a soft dent remains.

Step 3. Adjust seasonings to taste.  I have it on very good authority that the only ingredients you should adjust are the salt, bean juice, and lemon juice.

Step 4. Garnish with olive oil, paprika, or red pepper.  Eat with pita and za’atar.

*  Tahini is sesame seed paste or sesame butter.  You can find it at most health food stores, online, in the kosher section of your grocery store, or ethnic grocery stores.  Don’t be afraid to ask your store manager to carry it.  It is shelf stable, so they don’t have much to lose.  If you can’t find tahini just substitute 1/2 cup toasted sesame seeds.

Read Full Post »

Pita with Za’atar

Hello again!  I am glad you’re back.  Please, keep coming back!

Today’s recipe is a delicious dish from the middle east.  I’ve said before that I love all things Romanian.  True.  However, my first and lasting love is middle eastern food.  Garlic and spices combine for powerful flavors.  Is it a party in your mouth?  No-it is something much worse and really- that’s between you and your confessor.

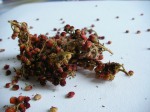
Like our last recipe, za’atar has an elusive ingredient: sumac berries.  Sumac berries are are very sour, like lemons, and give za’atar its characteristic zing.  The sour is also an indication of the berries very high vitamin C content.  Vitamin C can help you stay healthy during the fast.  Where can you find sumac berries?  You can find them anywhere wild sumac grows.

http://en.wikipedia.org/wiki/Sumac

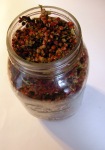
If, for some reason you don’t have a jar in your cabinet.  (You should)  Here is a picture of mine:

We collected ours during the summer.  A few hours in the food dehydrator made them suitable for storage.

Unfortunately, sumac is out of season.  Thanks to the interwebs you can find ground sumac online.   If you try this recipe and love it;  you, like us, may spend a few weeks this summer harvesting sumac berries along foot trails.  Two words of caution:

1.  The edible sumac is NOT the same as poison sumac.  If you are planning to hunt some up please review a published forager’s handbook.

2.  According to Samuel Thayer, The Forager’s Harvest, sumac is closely related to cashews and mangoes and can cause an allergic reaction in persons allergic to these foods.

Here is the recipe:

  • 1/4 cup sumac
  • 2 tablespoons thyme
  • 1 tablespoon roasted sesame seeds
  • 2 tablespoons marjoram
  • 2 tablespoons oregano
  • 1 teaspoon coarse salt
  • olive oil
  • pita bread

Step 1. Lord bless my work.

Step 2. Grind the berries and herbs in the food processor.  Or, for you hard core types, grind with a mortar and pestle.

Step 3. Add salt to the mix.  Do not grind.

Step 4. Brush pita with olive oil.

Step 5. Rub za’atar onto oiled pitas.  More is better.  Save the leftover za’atar in a jar for future use.

Step 6. Bake at 425 for 5-10 minutes.  Or broil, verrrrry carefully.

Sahtayn!

Next post is homemade pita!

Read Full Post »

Hi there!  Previously, I told you about eating fat during the fast.  The following is one of those friendly fat recipes and a delicious one at that.  Avocados have some of the ‘good fats’.  If you are fortunate enough to live in the south, avocados are readily available and cheap.  Up here in the frozen north we’re not so lucky.  Don’t despair!  During the Dormition and Nativity fasts avocados are in season so they may be cheaper.  During the Dormition fast tomatoes and jalapenos are plentiful as well.  Guac is delicious with corn chips or on burritos.  On to the recipe!

Guacamole

2 large avocados

2 1/2 Tablespoons lemon juice

2 Tablespoons chopped cilantro

1/2 t salt

1 clove chopped garlic or 1 tsp garlic powder if serving immediately

1 tomato chopped (1 cup)

1 onion chopped (approx. 1/2 cup) or 1/4 cup chopped green onion

1 jalapeno chopped or 1 T canned greened chilies (optional, adjust to taste)

1.  “Lord, bless my work”.

2. Cut avocados in half lengthwise pushing the blade down to the pit, but not through pit.  Remove pit and scoop out flesh with a tablespoon.  Mash avocados.

3.  Mix in all other ingredients, including jalapenos.

4.  Serve immediately or cover and refrigerate to blend flavors.  Place plastic wrap against the surface of guacamole to prevent browning.


Read Full Post »